
 |
Furniture Daves |
 |
Learn These Repair Techniques That Have Been Developed And Used
Apply These To All Types Of Furniture, Antique and Other Item Repairs...
These repairs are made to achieve a final item condition that enables the item to be used for it's original intended purpose in a fully functional and complete way...
These repairs don't intend or expect to make the item "brand new again", but only to bring it to a better level of use than it was previously at, both mechanically and esthetically...
![]() In addition, it should be EMPHASIZED that it makes NO SENSE to spend too much time and or money repairing an item, if it ultimately is not going to be worth what ever value that you would finally end up with when you have finished!
In addition, it should be EMPHASIZED that it makes NO SENSE to spend too much time and or money repairing an item, if it ultimately is not going to be worth what ever value that you would finally end up with when you have finished!
If you are going to do repairs a lot then you need the proper tools and materials... otherwise you can borrow them for a single repair... but it is advised strongly that you use these tools and materials for continued repair work:
- All the typical hand tools, such as hammers, pliers, screw-drivers, wire cutters, sockets and wrenches, allen wrenches, hack saws, regular saws, knives etc.
- Some power tools, such as a hand drill, a saber saw, a skill saw along with all the necessary tool bits and parts for all of these...
- You'll need plenty of repair stock, such as plywood, thin wood sheets, two-by-fours, furniture repair parts (knobs, wheels, trim pieces, hinges, fixtures etc), cardboard, fabrics for recovering work, metal stock such as aluminum and steel sheet and tube, rods and angles... rubber and foam stock and much more... start saving...
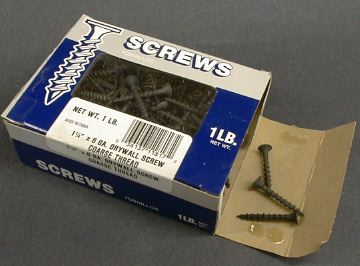
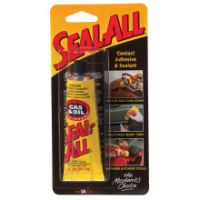
- In addition materials such as nails of all kinds, screws of all kinds (Try using Dry Wall Screws: Picture Click Here), hooks, buttons, wire etc, spray can paint and regular paint both acrylic and oil along with stain sealers, lacquer thinners and other solvents, paint brushes, putty, caulking, spackle, and plenty of adhesive caulking (Try using Loctite PL-3x: Picture Click Here), tape of all kinds, and glue (Try using Seal All Glue: Picture Click Here)...
- Find a nice place to work such as a garage, basement or any other suitable place and be sure to keep it safe and clean... always use hand, eye and lung protection when working and be especially careful with power tools and harmful solvents!
- NOTE: You can find many Tips on Painting, Varnishing Etc at our
Paint A House pages... check it out!
Need help making a repair? Ask me
Click Here
Learn These Repair Techniques That Have Been Developed And Used
For Dressers...
- Missing or broken knobs or handles Replace with stock hardware
- Broken drawers Use Loctite PL-3x, Seal-All, tape etc to repair, Use wood stock if necessary
- Drawers that don't slide or close properly Use Vaseline to grease tracks or edges... repair or replace slider tracks, worn "center wooden" tracks can sometimes be"reversed" (front to rear) to enable them to "catch" the metal drawer center slider which can also be "re-bent" for best sliding... other clever techniques for adjusting the "fit" can be made using small spacer pieces of wood shim stock along right and left bottom side front track areas... side "roller" tracks cab be replaced or carefully "adjusted", Use power saws to remove binding edges, Use files and sand paper to relieve binding surfaces, On some old wood cabinets, when top drawer will not fully close, try this repair method: Top Drawer Repair Method
- Broken legs Use Loctite PL-3x to repair, Use screws and mechanical fasteners to repair, Make replacement legs from stock
- Poor appearance Clean up with Lacquer Thinner, touch up with spray can paint, Repaint the whole piece, Revarnish the whole piece, Antique the whole piece, Restore the whole piece
Learn These Repair Techniques That Have Been Developed And Used
For Chairs...
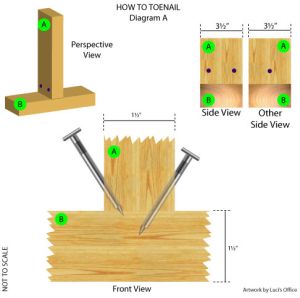
- Rough or broken legs or parts Use wood or metal stock to repair, Use dry wall screws, drill toenails using power drill, where necessary, See Below About Toe Nailing Screws, Use Loctite PL-3x, Use Seal All
- Loose arms or legs Use dry wall screws, drill in at toenail angle at arm or leg base into seat, but first always drill a pilot hole for the screw, using a 1/8 in drill, so the screw won't crack the hardwood...
See Picture Click Here, Use Loctite PL-3x in joints, Otherwise, remove arms converting to "armless" chair - Worn, discolored or poor fabric Clean with soap and water, Recover with fabric stock, use foam stock for padding if necessary, use staple gun to attach fabric
- Poor appearance Use Spray Can Paint to freshen up, Or use regular paint and Repaint entire chair
Learn These Repair Techniques That Have Been Developed And Used
For Tables...
- Loose, missing or broken legs Tighten leg nuts or screws,
Make a new leg,
Use Loctite PL-3x, screws, wood and metal stock... Use dry wall screws, drill in at toenail angle at leg base into frame, but first always drill a pilot hole for the screw, using a 1/8 in drill, so the screw won't crack the hardwood...
See Picture Click Here, Find completely new leg sets and replace with them - Table not level For metal umbrella tables, bend legs to fix, Adjust height screws on leg bottom, Saw off leg bottoms to level table
- Discolored or poor top surface Use wood filler, spackle, or putty for small defects, Clean with Lacquer Thinner then touch up with Spray Can Paint, Completely Repaint with spray can paint, Completely Revarnish, Completely Repaint with regular paint, Completely Restore the whole piece Recover with fabric stock
Learn These Repair Techniques That Have Been Developed And Used
For Wicker...
- Loose or frayed pieces or holes in wicker Trim with scissors, fasten with Liquid Nails or staple gun, Collect extra wicker material, cut and use as "patches" applied from "back side", attach with Seal All, Touch up with Spray Can Paint
- Loose legs, arms or other pieces Use dry wall screws to repair, attach with power drill where necessary
Learn These Repair Techniques That Have Been Developed And Used
For Rugs...
- Loose or frayed pieces, or loose braids on braided rugs Trim with scissors, lock in with Seal All Glue, sew up braids with industrial thread, Touch up with spray can paint
- Small marks or stains Use Lacquer Thinner to remove, touch up locally with "Magic Marker" or spray can paint or use small brush and regular paint
- Dirty surfaces Hang over a fence, wet with water using garden hose, wash with soap, hot water and scrub brush, then rince with garden hose and water, let dry
Learn These Repair Techniques That Have Been Developed And Used
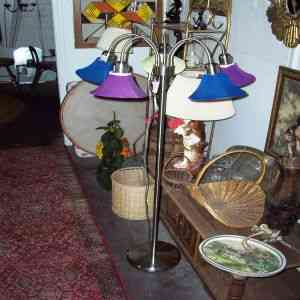
For Lamps...
- Will not light up Replace bulbs, Check all wiring for shorts, Check all switches for defects or shorts
- Missing shade or parts Replace with stock parts
- Dirty or marked up Clean with damp cloth, or Lacquer Thinner, touch up with paint or "Magic Marker", Or repaint with spray can paint
Learn These Repair Techniques That Have Been Developed And Used
For Toys...
- Bent or broken wheels Remove and straighten, hold axle with bench vise then rebend it using long piece of pipe, get the bend "just right" so caster effect properly works... use cloth tape saturated with Seal All Glue to repair hollow plastic wheels... fix worn axle holes with sheet metal, or washers... get replacement parts from hardware stores
- Toys left outdoors collect water Drill 1/4 inch drain holes at appropriate locations
- Broken or missing handles Repair with metal stock and screws, Make replacement parts from stock
- Poor appearance Clean then touch up or repaint with spray can paint
Learn These Repair Techniques That Have Been Developed And Used
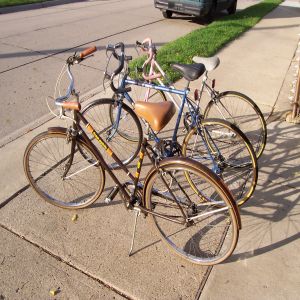
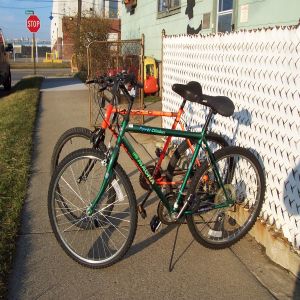
For Bikes...
- Bent or broken wheels Replace with replacement stock
- Tires won't hold air Buy new tubes and install
- Broken cables or small parts Buy replacement cables and install, Replace parts with stock replacements
- Poor appearance Clean then touch up or repaint with spray can paint
- Rides and handles poorly Adjust bars and seat, Adjust brake cables, replace pads if worn, Check for correct tire pressure
- De-Railers won't shift properly Adjust set screws and cables and spray with WD-40, Replace with replacement De-Railer
Learn These Repair Techniques That Have Been Developed And Used
For Pictures & Mirrors...
- Worn frames Touch up with spray can paint
- Smallmarks or defects Touch up with "Magic Marker" or regular paint
- Broken glass or small cracks or chips If too much is broken, it's useless to repair, Replacement glass and mirrors are costly, Small cracks or chips are tolerable and are best left as is, Try using Aluminum or Silver Paint on "back side" of Mirrors for small areas of wear
- Poor appearance Touch up or repaint with spray can paint, Clean with furniture polish
- Wall hangers are broken or missing Repair with wire stock, Make new hangers with wire stock and screws
Learn These Repair Techniques That Have Been Developed And Used
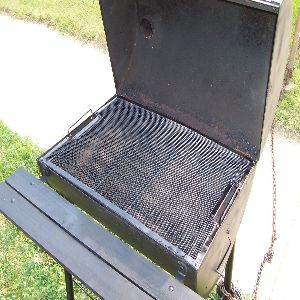
For BBQ'S...
- Rusted bottoms or other areas If too much is rusted there's no viable repair, Otherwise repair with sheet metal stock and screws, Or just sand down and Paint With Spray Can Paint
- Dirty pits Scrape, clean pit and wire brush the grills
- Missing grills Replace with replacement grills
- Broken legs Repair with metal stock, flat, tube or brackets, Hack saw off uneven leg ends
- Loose legs or loose or missing handles Tighten up screws, wrap electrical tape around leg top and bracket it fits into on bottom, Make replacement handles from stock
- Small holes in pit Use Loctite PL-3x to seal, Use sheet metal pieces to seal, attach with Loctite PL-3x
- Air vents stuck or broken Use WD-40 to free up, Remove broken vents, and use as without them
- Poor apperance Touch up or Repaint With Spray Can Paint, No need to use expensive heat resistant paint
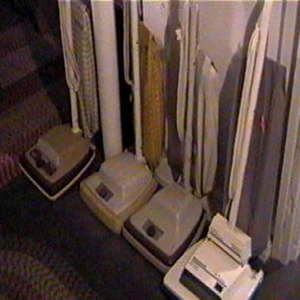
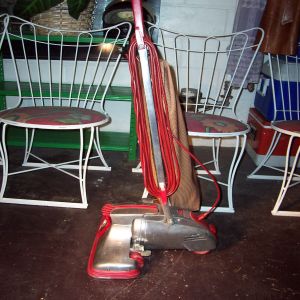
Learn These Repair Techniques That Have Been Developed And Used
For Vacuums...
- Dirty vacuums Disassemble and clean all parts
- Broken or defective parts Replace with replacement parts, bags, belts, lights etc
- Poor appearance Clean with Lacquer Thinner, Touch up with paint
- Loud clanking noise when running If it's not tolerable, discard the vacuum, it has a cracked or broken impeller blade(s)
- Will not run Check and replace switch, Check for short in electrical system, Discard vacuum, the motor is defective
- Will not clean carpet properly Replace bag, Replace belt, Replace beater bar, Adjust height adjuster up or down, Discard vacuum, the motor is defective
Learn These Repair Techniques That Have Been Developed And Used
For Wheel Barrels...
- Dirty Wash with garden hose and water
- Flat tire Try banging the tire against the rim while inflating it, For tubeless tires, apply Seal All Glue around tire inner edges on both sides, to contact the wheel, then inflate, Replace tube, Replace with SOLID tire
- Wheel is locked up Spray axle with WD-40 and work the wheel free
- Bed has holes in it Use Loctite PL-3x to seal them, Use small metal sheet stock with Loctite PL-3x to seal them
- Poor appearance Paint With Spray Can Paint
Learn These Repair Techniques That Have Been Developed And Used
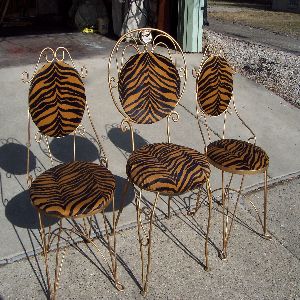
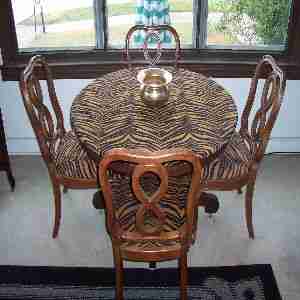
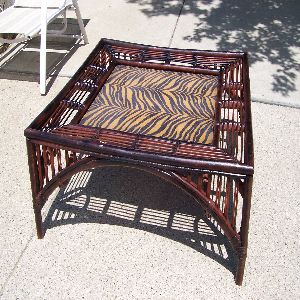
Repair Pics...
These Repair Pics represent typical repairs in various categories... they require all the necessary knowledge of standard mechanical object repair along with personal esthetic styling by the worker...
These pictures have been chosen to represent common repair techniques but there are many more techniques that you will surely need to impliment if you expand your general knowlegde of Repair...
The pictures shown represent the "finished job" but of course you will have many preliminary steps involved... depending on the particular repair project...
Upholstry Pics
Iron Chairs
Metal Chairs
Wood Table
Bamboo Coffeetable
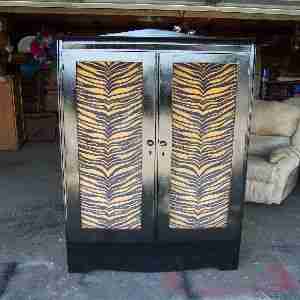
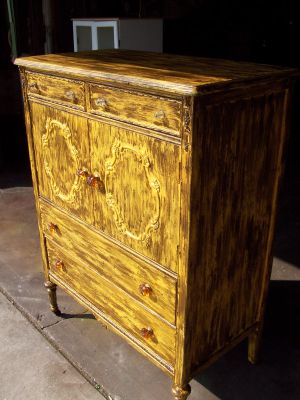
Tiger Wardrobe
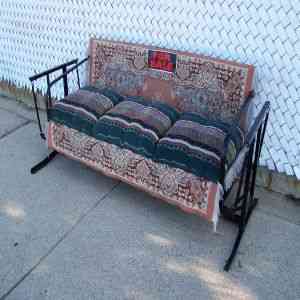
Carpet Glider
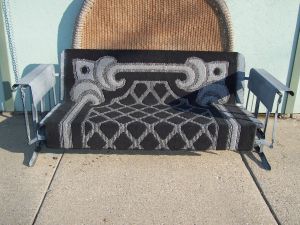
Another Carpet Glider
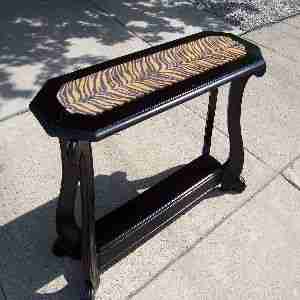
Sofa Table
Wood Repair Pics
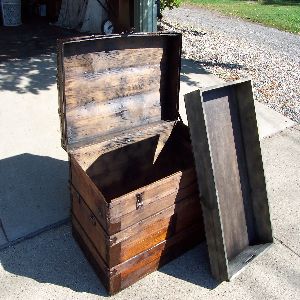
Old Trunk
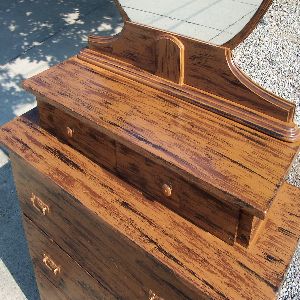
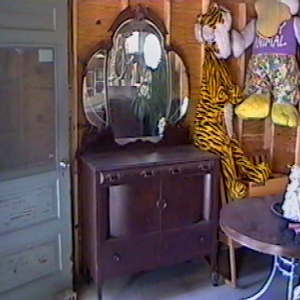
Old Tier Dresser
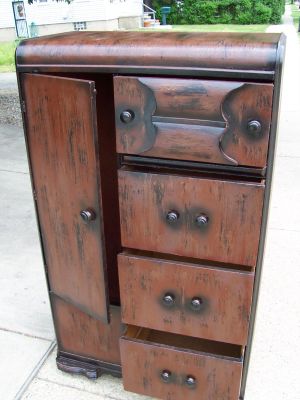
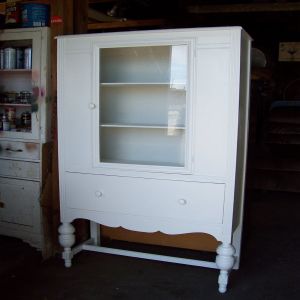
Antique Wardrobe
Antique Armoire
Old China Cabinet
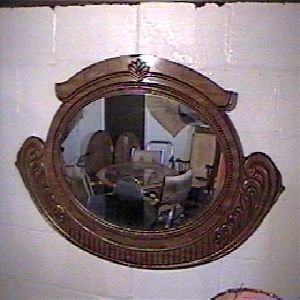
Custom Mirror
Old Buffet
Old Radio
Very Old Radio
Metal Work Pics
Barbeque
Barbeque
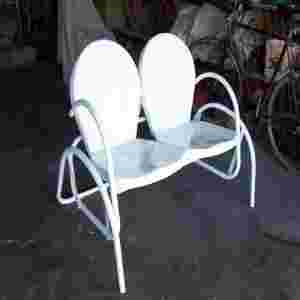
Glider
Spider Lamp
Tulip Glider
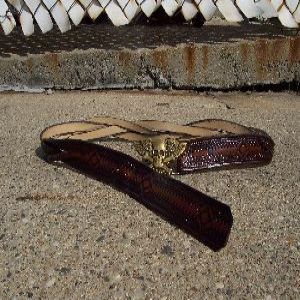
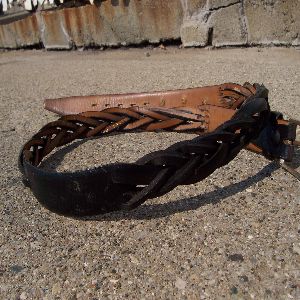
Belt Weaving Pics
Bike Repair Pics
Bikes
More Bikes
Even More Bikes
Vacuum Repair Pics
Learn These Repair Techniques That Have Been Developed And Used
Refinishing...
These Refinishing Techniques have been proven efficient and reliable and will give you excellent results if followed accurately, using HIGH QUALITY TOOLS AND MATERIALS[1]...
A clean work environment is also necessary, and please follow good "job clean-up practices" when you are finished... by disposing of used materials properly and cleaning up your tools, work area and yourself properly...
Use eye, hand and lung protection when working with potentially harmful materials and when using tools... ALWAYS FOLLOW LABEL INSTRUCTIONS!!!
You can find lots of very helpful Refinishing Reference Information at our
Paint A House web site!
Cleaning Techniques
Remove dried paint splatter spots with pocket knife
Wash with soap and water
Light-wipe with Lacquer Thinner, remove stains, grease
Surface Preping
Use putty, caulk, wood filler, spackle
Use sand paper, light, medium, coarse
Use wood files, steel wool, wire brush
Priming
Read: Priliminary Info Here
Use interior-exterior oil base primer stain sealer[2], for wood and metal
Most pieces require brush application
Reference Info Here
Painting
Read: Priliminary Info Here
Do surface cleaning if necessary
Do surface prep if necessary
Do priming if necessary
Paint with spray can paint[3]
Paint with regular paint, oil or acrylic, use brush applicator
Varnishing
Read: Priliminary Info Here
Do surface cleaning if necessary
Do surface prep if necessary
Use oil base varnish
Use clear finish
Use satin, semi or gloss sheen
Use 1 hour fast dry varnish
Use regular 3-4 hour drying varnish
Reference Info Here
Staining
Read: Priliminary Info Here
Do surface cleaning if necessary
Do surface prep if necessary
Use oil base stain
Wipe off excess quickly with a rag, to give a uniform appearance
Allow 3-4 hours for drying
It's best to Varnish over the stain after it drys to give a protective surface...
Reference Info Here
Antiquing
Read: Priliminary Info Here
Do surface cleaning if necessary
Do surface prep if necessary
Do priming if necessary...
Reference Info Here
Apply base color coat
Apply graining color coat, using various application methods, brush, steel wool, sponge, cloth, etc
Apply finish coat of protective spar varnish...
Reference Info Here
Restoring
Read: Priliminary Info Here
Do surface cleaning with Lacquer Thinner
Do surface prep if necessary
Apply restorer product, then wipe off a.s.a.p.
Allow 3-4 hours for drying
Apply finish coat of protective spar varnish (contrary to most product label instructions... varnish will give a better uniform finish, as well as protection from liquid spills)...
Reference Info Here